Showing posts with label cake. Show all posts

Wednesday, 19 November 2014

Apple sauce and fudge snickerdoodle bread


The term bread in the name of today's recipe most certainly refers only to the shape of the thing, as it's most definitely a cake. I don't mind at all! And you could convince yourself to think it's almost healthy. It has some whole meal flour after all. And the butter is replaced by apple sauce and oil. So yes, let's all stick our heads in the sand and pretend it's healthy, because I bet you can't stop at one slice. Or maybe you can, which means to say you are more disciplined than I am. But then again, that's not much to brag about as my self control is non-existent. Especially when it comes to carbs. And in this case, the carbs are accompanied by delicious apple sauce, fudge, sugar and cinnamon. It must count as one of your five a day because of the apple, right?

This recipe is directly copied from This Gal Cooks. When this bread came up on my blog feed I immediately pinned it to bake as soon as I made a batch of stewed apple. I assumed that would work to replace the apple sauce, which it did very well.  Also, I'm not quite sure of the difference between butterscotch and fudge chunks, I couldn't find the former, so I'm assuming it's about equivalent with the latter. Probably a US vs. UK thing.  

Apple, fudge and snickerdoodle bread (makes 1 loaf):
1 3/4 cups all purpose flour
1/2 cup wholewheat flour
3/4 cup caster sugar
2 tsp baking powder
2 tsp apple pie spice (I don't have any, so I added some cinnamon, nutmeg and ground cloves, would have added some ground ginger as well, but had just run out)
1/4 tsp salt
1 cup apple sauce (I used our home-made stewed apple)
1/2 cup vegetable oil
1/2 cup light brown sugar
1/4 cup water
2 large eggs
1 tsp vanilla extract
1 cup fudge chunks (or butterscotch chips)
(1 tbsp flour)
1 tbsp light brown sugar
1 tsp cinnamon

The howto:
Preheat oven to 175 degrees C (350 degrees F). Prepare your loaf tin by buttering if needed. I used my trusty silicone loaf tin which I never butter, and everything always pops out perfectly fine.

In a bowl, mix together the flours, caster sugar, baking powder and spices. In another bowl, mix together the apple sauce, oil, brown sugar, water, eggs and vanilla extract. Combine the dry ingredients into the wet, mix as little as possible. If you want to, coat the butterscotch/fudge chunks in flour (I skipped this step) and mix into the batter. Pour into the loaf tin. Mix the tbsp of brown sugar with cinnamon and sprinkle on top of the bread. Bake for about an hour, until a cake tester comes out clean. If the top gets too dark, cover with foil. Let cool completely before cutting.
The Verdict:
I have eaten three slices of this bread for breakfast. 'Nuff said.


Wednesday, 12 November 2014

Apple cake with brown butter frosting


I had a big bunch of juicy apples and needed something to use them for. Of course I went looking for a cake recipe, and found this apple cake recipe from Cookies & Cups that I had pinned earlier for and emergency like this. I mean, those apples would have gone bad very soon, I'm convinced of that. And eating them as is just seemed a bit.... too healthy I guess. So obviously adding lots of butter and sugar was the only possible solution to my dilemma. 

At this point I also owe the food blogging community a grand apology. I have not jumped on the browed butter trend before, as I have thought it can't anything too exciting. I mean butter is butter, right? I love butter, of course, but I really didn't think there would be such a big difference. And then I made the frosting, and had a taste... And realised why browed butter is such a huge trend. Just take my word for it, if you haven't jumped on the browed butter bandwagon yet, quickly quickly grab that butter and chuck it in a saucepan. You won't look back!

Apple cake with browned butter frosting (from Cookies & Cups):
225 g unsalted butter at room temperature
1 cup brown sugar
1 cup caster sugar
3 eggs
1 tsp vanilla paste (or 2 tsp vanilla extract)
2 tsp baking soda
1/2 tsp salt
2 tsp cinnamon
2 1/2 cups flour
3 cups cubed apple (about 3 large apples)

Browned butter frosting
110 g butter
3 cups icing sugar
1/2 tsp vanilla paste or 1 tsp vanilla extract
1-2 tbsp milk

The Howto:
Butter a bundt cake pan. Peel and cube the apples. Preheat oven to 175 degrees C (350 degrees F). Cream together the butter and sugar. Add vanilla and the eggs one at a time and keep whisking for a bit longer. In another bowl, mix the baking soda, salt, cinnamon and flour. Mix the dry ingredients into the butter and sugar mixture. Fold the apples into the mixture. Transfer to cake pan and bake for 55-60 minutes, or until a cake tester comes out clean. Let cool in the pan for 10-20 minutes, then transfer to a wire rack to cool. 

To prepare the frosting, melt the butter in a saucepan and brown until gently browned. Remove from the heat and add the icing sugar and vanilla and mix using an electric whisk. Add milk until the frosting is your desired consistency. Frost your cake while trying very hard to resist the urge to eat the frosting right then and there with a spoon right out of the saucepan.

The Verdict:
This cake is great as it's very quick to prepare. The only problem I had was to get it out of the pan. It certainly didn't come out nice and clean, but then again that's what you have frosting for, to cover up the tears and cracks.

The cake is lovely and moist thanks to the apple pieces. But now, let's talk about the frosting. No, wait - let's just sit down and be quiet for a minute to contemplate the awesomeness of the frosting. It's so hard to believe that it's nothing but butter, icing sugar and vanilla. Well, it's not just butter, it's browned  butter. And that makes all the difference. It's like maple syrup and caramel fell in love and had a baby. The most beautiful baby in the world. If all food bloggers in the world are raving about something, it must be something special. Like browned butter. I can't believe I have lived without it for this long. But now I have seen the light.

Saturday, 23 August 2014

Cinnamon swirl banana bread


Ok, so I'm not liking this whole posting only once a week thing. It always seems like an eternity since I last blogged on here. And I seem to have found my cooking mojo again. So I may go back to occasionally sneak in a mid-week post as well, depending on how things go. And I have at least two new recipes I want to try this weekend, which if they turn out to be successful, I may want to share.

Other than cooking mojo this has been a crazy week. I have been blown away by the generosity of people. In my current job, one of the things I do is co-ordinate biomedical research studies, and one aspect of that is to invite volunteers to come to the Blood Donor Centre to give a blood sample for our studies (oh and there is another study where we actually take a skin sample, but that is another story). Anyhow, I just fired up a new study, and was all of a sudden told that I need to get in 30 people before the end of September. I said there is no way in you know where that is ever going to happen. But then I got this huge tidal wave of responses from the invited volunteers, and all but two of them so far have been "yes, I would be happy to participate". So it might be we will be able to pull off a miracle and actually get 30 of them in during September. I am blown away how far people are willing to travel to come to us to participate, and how they are happy to even take a whole day off work just to come and give a blood sample. Working with these amazing people keep restoring my failing faith in humanity.

What never fails is my fascination for cake. I know it's a bit unimaginative to publish two cake recipes in a row (I hope you didn't miss my courgette and lemon bread last week). Oh wait, it's not cake, it's bread. That's ok then isn't it? Two bread recipes in a row. This little baby is where bananas go right before they would go into the bin. When they look ugly and black, but have all that lovely sweetness that will make this loaf taste heavenly. 

I have used the recipe almost unchanged from the Lovin' From the Oven blog. The only change I made was to use 2 bananas instead of 3 in the original recipe. But my bananas were huge so I think they more or less were equivalent to three punier bananas. Make sure they are over ripe, that's where all the sweetness comes from. Plenty of those pesky black dots on the peel, that's how you know they are good to go. And I love that all the ingredients are basic stuff, most likely to be in your kitchen any time those bananas threaten to turn too black, to satisfy a sweet craving at any time over-ripe bananas are available. And all you need is one bowl, do a bit of a mix and it's all ready to go in the oven.

Banana bread (makes one loaf):

2 over-ripe bananas, mushed with a fork
75 g melted butter
3/4 cups sugar
1 egg
1 tsp vanilla (I used vanilla paste)
1 tsp baking soda
pinch of salt
1 1/2 cups flour

For the swirl:

1/3 cup sugar (I used muscovado)
2 tbsp cinnamon

The howto:

Preheat oven to 175 degrees C (350 F). Butter a loaf tin (I used my silicon loaf tin as it saves the trouble of preparing it). Mix the smashed bananas with the melted butter, sugar, egg and vanilla. If you want to be fancy, you can mix the soda, salt and flour in another bowl, but to save me from doing dishes, I just tossed them right in and gave a gentile stir, making sure not to over mix. Combine the ingredients for the swirl separately. Add half of the batter into the loaf tin, sprinkle over half of the cinnamon sugar and add the rest of the batter. Sprinkle the rest of the sugar on top. Bake for 50-60 minutes until a cake tester comes out clean (mine took 60 minutes to bake).


The Verdict:
I've tried a few different recipes for banana loaf. And while none of them are bad, I never felt like I really understood why others were so into banana bread. After baking this, I can honesty say I finally understand what the hype is all about. It's deliciously moist, and the cinnamon swirl and cinnamon topping go perfectly with the banana. Some banana breads I have made are too "banana-y", this is just perfectly balanced. Sweet and a touch of banana, but not overwhelming. The comment from the Culinary Consultant "You can make this banana bread any time you like". While scoffing down his slice. I could imagine adding a handful of dark chocolate chips would be perfect in the batter, but it's also heavenly as is. Oh and as usual I apologise for the suboptimal photos, but I just took a quick snap as I was very busy getting to the actual eating part. You will understand what I mean when you make it, the scent of the bread is just unbelievable!

Saturday, 16 August 2014

Courgette and lemon bread


So what have you all been up to? I know I wrote a few weeks ago about feeling like I had lost my kitchen mojo. I think just writing about it helped, as after that post, I spent almost the whole next weekend in the kitchen, making many things including this amazing bread.

I tried a recipe for courgette chocolate bread once. I didn't think I would ever say this about anything with chocolate, but it wasn't too brilliant. And it put me off courgette bread for a long time. Until I saw this Lemon Zucchini bread from My Baking Addiction when browsing the blogs I follow the other day. 

I feel it was divine intervention as we have quite a crop of courgettes that need to be harvested, and I am having courgettes and tomatoes coming out of my ears (not that I'm complaining, I love them!!). I have tried a few courgette cakes in the past, and found them at best more or less average, but I thought I would try this as we both like lemon drizzle cake in this house, and I thought the lemon drizzle would add a bit of oomph to what I usually find are rather boring cakes. This is a really simple bake to put together, all you need is one bowl, a spatula and a loaf tin. I love how it's called bread instead of cake, so you don't feel like you are having a treat, just a slice of bread. And not just any bread, courgette bread which has to count towards one of your five a day.

Courgette and lemon bread (makes one loaf)
3/4 cup sugar
2 tbsp lemon zest (I used whatever zest I could get from 2 lemons)
1 large egg
1/2 cup vegetable oil (I used rapeseed)
1 tsp vanilla extract
1 1/2 cups grated courgette (packed and undrained)
1 1/2 cups all purpose flour
1/2 tsp salt
1/2 tsp baking soda
1/4 tsp baking powder
1 tsp ground cinnamon

Glaze:
1/2 cup icing sugar
1 tbsp fresh lemon juice (I had to add a bit more to make the drizzle a good consistency)
1/4 tsp vanilla extract


The howto:
Preheat oven to 160 degrees C. Butter a 8x4 in loaf pan, or line with parchment paper (or use a silicone mould like I did, they don't need any prepping). Combine sugar and lemon zest, rubbing them together with your fingers until fragrant (it makes your fingers smell amazing too!). Add egg, oil and vanilla and mix. Add courgette. In a separate bowl, mix flour, salt, baking soda, baking powder and cinnamon (I probably don't have to say I can't be bothered with this step and just mix them straight into the batter, I am too lazy to wash up an extra bowl). Add the flour mixture to the courgette batter and mix only until combined. Pour into loaf tin and bake for 50-60 minutes or until a cake tester comes out clean. Cool in the tin for about 10 minutes before turning out onto a wire rack to cool completely. For the glaze, mix all ingredients and drizzle over the bread once it's completely cooled. Store in fridge, keeps for 4-5 days.

The verdict:
I was not expecting much from this bread due to my previous experiences. But it was very tasty. It was lovely and moist, and the glaze added the perfect final touch. I ate this for breakfast at work with a cup of coffee, and we also had it for pudding. I was amazed at how moist the bread was, even after several days in the fridge. Certainly a very enjoyable way to enjoy your courgettes. And finally a recipe for courgette bread I will make again!

Sunday, 8 June 2014

Magic custard cake with summer fruit


I'm not sure I completely get the thing with custard. I mean, it's not bad, I wouldn't spit in a bowl of custard, but at the same time it's everywhere. The Culinary Consultant loves his custard, I'm sure he would be happy just eating it out of the tub with a spoon. If we have pudding with custard I know the pudding is there just for show, and the correct custard to pudding ratio is at least 3:1. And it seems like my Culinary Consultant is not the only British male who likes his custard. The Toddster, who is the Culinary Consultant equivalent on the lovely blog The English Kitchen, also seems to love his custard. So when I saw the recipe for this Custard Cake on the blog and read about how the Toddster loves his custard, I had to laugh out loud and obviously also decided I need to bake this cake for the Culinary Consultant. 

It's a very simple cake to put together, but you don't quite get away with doing it in one bowl as you need another bowl for whipping the egg whites. And it uses only basic ingredients you should have at hand at any time. It doesn't take many minutes to prepare. The hard thing is to wait for the necessary three hours while the cake cools. And as the original recipe says, please be aware that the batter is very runny and you will think this won't work at all and that you have done something wrong. You haven't. It will work. But don't use a springform pan!

Magic custard cake (serves 8):
4 eggs at room temperature
2 tbsp water
150 g caster sugar
2 tsp vanilla extract (I used the equivalent amount of vanilla paste)
125 g butter, melted
115 g all purpose flour
500 ml milk
To serve:
icing sugar
berries or fruit (I used strawberries and rhubarb compote)

The howto:
Preheat the oven to 160 degrees C. Carefully butter a cake tin (8 inches in diameter). I used a silicone cake tin and didn't prepare it in any way, and had no problems with sticking. 

Separate eggs into two bowls. Beat the egg whites until stiff peaks form. Add water, sugar and vanilla to the egg yolks and beat until light and fluffy. Add the melted butter and keep whisking. Add the flour and milk, and whisk until a smooth batter forms. Gently fold in the egg whites. Bake for 1 hour, or until golden brown. Let cool for at least 3 hours before dusting with icing sugar and serving with fruit or berries.

The verdict:
This is what it says on the tin, custard cake. It tastes like custard, but it's a cake. You won't believe it will ever become an actual cake when you pour the runny batter into the cake tin, but somehow magically it will turn into a cake after all. I think mine could have done with just a few minutes less in the oven, as the middle of the cake turned quite solid whereas the pictures on the blog with the original recipe it looked like the middle stays just a little bit gooey. But it was really yummy especially with rhubarb and strawberries on top. Definitely a summer dessert I will try again, I think this would be a great alternative for a cheesecake for a BBQ or other summer get-together.


Saturday, 19 April 2014

Blog Birthday 2.0


How time flies... It's already more than two years ago I wrote my first blog post. To be exact, my first blog post was published on April 9th 2012, but I consider Easter to be the blog's birthday. It was Easter holiday and I was rather bored and wanted something to do so I started a food blog after baking at least three different kinds of muffins over the Easter break. I had never had a blog, and to be quite honest, I hadn't read that many blogs either. I was inspired by a great Finnish food blog called Kauhaa ja Rakkautta. I can't claim I know much more about blogging today, I just make it up as I go along. But it's been fun so far, and who would have thought I would still be here two years later. And by that I mean blogging, I did expect I would still be "here" in the broader sense...

I feel a bit dizzy thinking back about all the things that have happened in such a short amount of time! I have changed jobs twice. Moved twice. Bought a house. Met he Culinary Consultant. Not necessarily in that order.


Two Easters ago I cooked myself some lamb, all by myself. Yesterday I cooked Easter lamb for two, using herbs from our own garden. I think the morale of the story is if you are unhappy with your life, it can change around very quickly. But it won't just come to you, you need to work on it and if you work hard and believe things will change, eventually they do. 

Professionally, it wasn't easy. Two years ago, around this time of year I had a year left on my Post Doc fellowship. I knew I wanted to get out of science, and that I would have to start looking for jobs eventually. Somewhat less than a year later, I had figured out what I wanted to do, after attending numerous career events and meetings with the career guidance councillor at the University. I worked hard on my applications and my CV and got an interview for what I thought was my dream job. I didn't get it. I got another job which soon turned out to suck the life out of me. So as hard as it was, about six months later I started the whole cycle again. Applying for jobs in the midst of burn out and depression was tough, I won't lie. Numerous job applications and several interviews later I was offered a new job last December, and started in early March after my three month (a.k.a. eternally long) notice period. I don't want to jinx it, but s far so good. Yes, it was hell last autumn when after a long day working a job I hated I came home only to spend hours searching for jobs and re-writing my CV over and over. But it worked out in the end. 


Personally it wasn't easy either. I tried it all, pubs, restaurants, parties, horse races, internet dating. Met a few people, but it didn't work out. Met someone I thought it would work out with, but I liked my shoes too much for his taste. After a gym class the Culinary Consultant asked me out. I didn't think he was my type at all, but I said yes still thinking at least I would get a free meal out of it. Our first dates were ok, but not all too exciting, we didn't have that much to talk about. But we stuck through those initial awkward dates and here we are. In hindsight, I feel I was too focussed on what I thought I wanted from a significant other. It turned out I met someone completely different. I had to give up a lot of preconceptions I had built up in my mind. It was hard, and it wouldn't have worked with someone else who would have been less committed and had less faith in us. But with the Culinary Consultant it has worked out well. So far at least. My life changed so quick, I accept it can change again. But it will all be all right somehow.

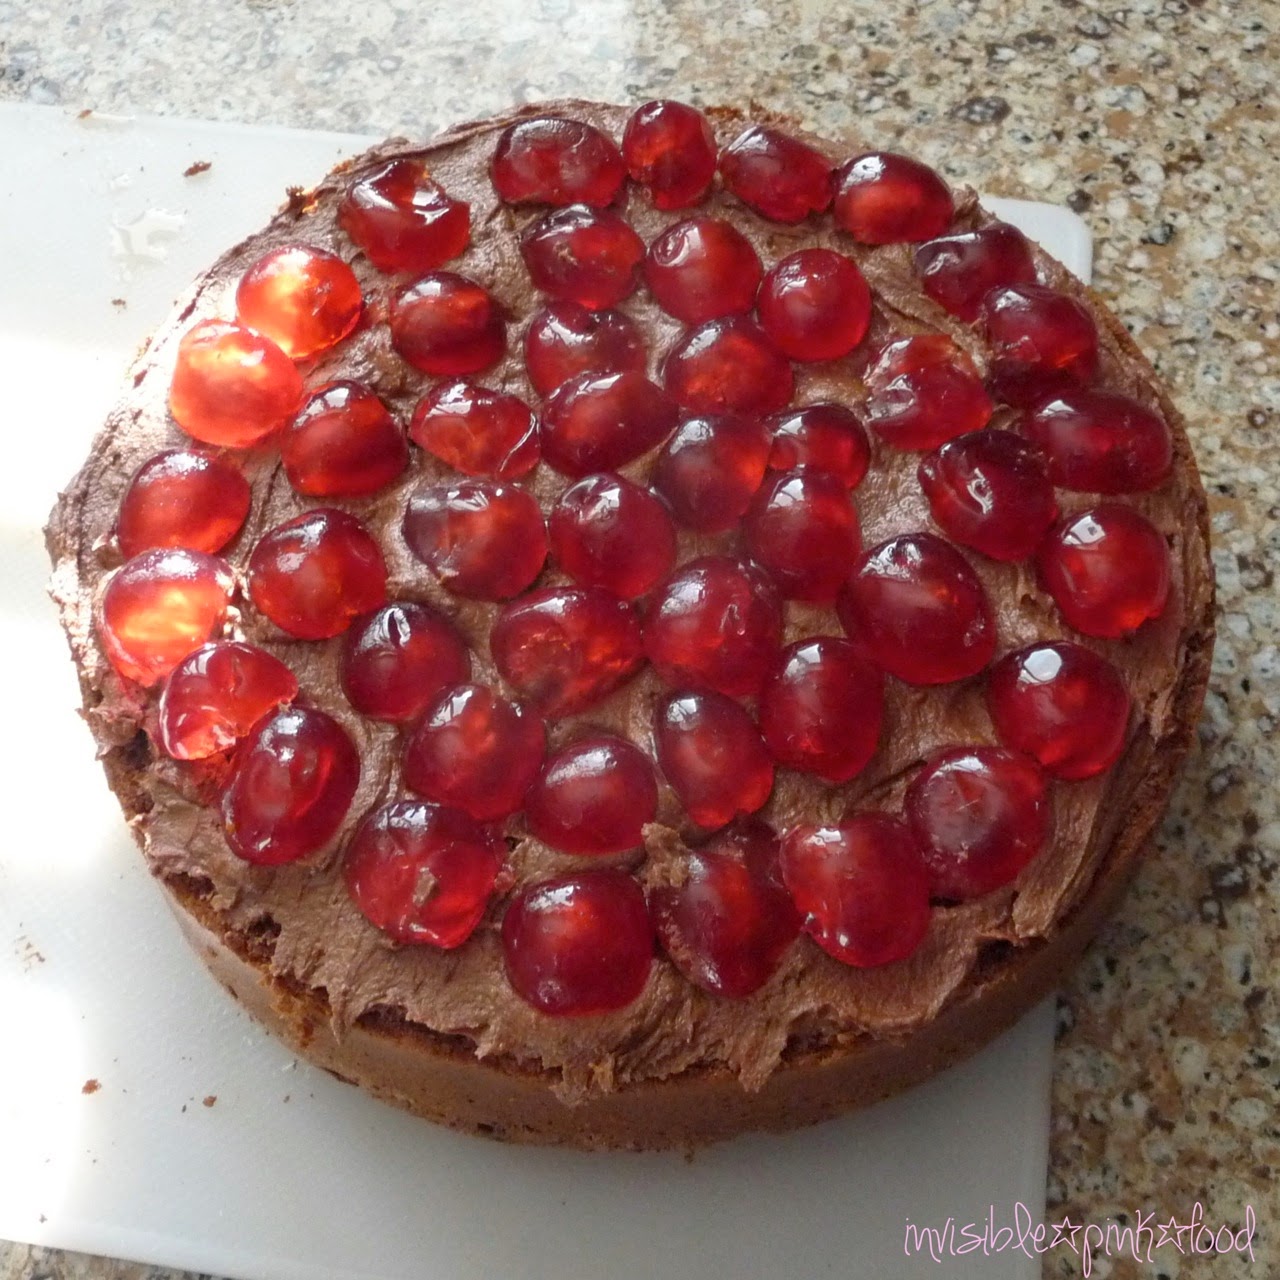
In addition to the two year blog birthday, I recently published my 200th blog post (and totally missed the moment, only realising a few posts later that I am past the 200 post mark). So to celebrate over two years and 200 posts of Invisible Pink Food, I though a cake would be in order. Unfortunately we have been without Internet the best part of the last two days, so I had to make this one up as I went along. Good thing I know the easy way of making a basic sponge cake: equal volumes of eggs, sugar and flour. It's not a fancy cake, just something you can throw together from stuff you have in the cupboard. And I even managed to get it done before it got dark outside, so for a change I managed to take photos in daylight! Now I'll finish my random rant and head off to enjoy my cake.

Chocolate and cherry cake (serves 4-6):
3 eggs
sugar
all purpose flour
2 tsp baking powder
1tsp vanilla syrup
100g chocolate (54% cocoa solids), melted
150 g glacé cherries
4 tbsp honey rum

For the buttercream:
140 g butter (room temperature)
250 g icing sugar
200 g chocolate

The howto:
Preheat oven to 200 degrees C. Take three identical glasses. Crack the eggs into one glass, and fill the second with sugar to the same level as the eggs. Fill the third glass to the same level with flour and add baking powder. Whisk the eggs and sugar until white and fluffy. Add vanilla syrup and chocolate. Mix gently. Gently fold in the flour. Pour into a 15 cm round springform cake tin and bake for 35 minutes or until a cake tester comes out clean.

Let the cake cool a few minutes, remove from the tin and let cool on a wire rack. Meanwhile prepare the buttercream. Star by melting the chocolate. Using an electric whisk, mix butter and icing sugar until smooth, white and fluffy. Add the chocolate and mix until smooth. Put a few tablespoons of the buttercream into a piping bag with a star nozzle.

Cut the cake in half, and drizzle the rum onto the cake halves. Add buttercream onto one half and cover with halved glacé cherries. Place other half of the cake on top, and cover with buttercream. Pipe eight roses of buttercream and place a cherry on top of each of them.

The verdict:
It's cake. With chocolate. And buttercream. What did you expect? Of course it's amazing! The sponge is light and fluffy, the rum brings just a little hint of spice and breaks the sweetness of the chocolate. And I like the fact that this is not a huge cake. It's something two people can reasonably eat over a few days while it's still fresh and good. Although cake does get better after a night in the fridge, this is more the rule than the exception. Nothing like starting your day with morning coffee and a slice of decadent chocolate cake!


Wednesday, 2 April 2014

Mary Berry's carrot cake


Why is it that men come with a huge collection of all sorts of doodaahs? I get the fact that you might need a DVD player and a satellite decoder (I had to ask the Culinary Consultant what the thing is called, I knew it had something to do with satellite...). And cables! Boxes and boxes of the most obscure cables which never seem to be needed, but have to be stored nonetheless. Had I only measured the length of cables I shoved into moving boxes when we vacated the Bachelor Pad. I would say there were miles of them, possibly enough to reach to the moon and back. Twice. What they are needed for is beyond me, but when it comes to men, it seems to be all about who has the longest cables. We also have a number of silver/black/white boxes located in the shelving unit underneath our gigantic TV (another mine is bigger than yours device). Not sure what they are needed for as several of them have never been used. But hey ho, apparently men just come with all this baggage. And the other day, Man Friend (a friend of the Culinary Consultant) brought yet another doodaah into the house. It's one of those game console things, and apparently we have to have it. Not sure why, as the Culinary Consultant spends all his free hours in front of his computer playing games. Again, I don't need to understand it, it's yet another box with yet more cables. However, if I ever meet the person who decided that all games that go with said console have to be packed in bright neon green covers, I will give them a piece of my mind. Seriously, they are the ugliest things I have ever seen! And now there are stacks of said fugliness all over our living room. I have decreed that we now have to buy a new storage unit to the living room, one with doors, so that I don't have to constantly look at those neon green horrors. All you women out there, let me know how you cope with all of this? I'm sure I can't be the only one facing this male behaviour.

Don't get me wrong, despite all these horrors the men in our lives sometimes have good ideas as well. Like the other day when we were in the grocery store and the Culinary Consultant was picking out carrots for our Sunday roast he thought the carrots looked unusually good so he asked whether we could make a carrot cake. I assured him that would not be a problem. When have I ever refused to bake a cake? Although obviously we in this case meant me. I hate grating carrots.

I don't have a "tried and tested" carrot cake recipe, and I tried one last fall that was supposed to be "the best carrot cake ever". Sadly it turned out rather dry and not that good. So this time I turned to Queen Mary Berry for a carrot cake recipe. Don't tell anyone, but I added some raisins which weren't in the original recipe. I wonder if she would disapprove...

Mary Berry's carrot cake (serves 8):
250 g sunflower oil (I didn't have sunflower so I used rapeseed)
4 large eggs
225 g light muscovado sugar
200 g carrots, coarsely grated (this was about 2 carrots)
300 g self raising flour
2 tsp baking powder
1 tsp mixed spice and 1 tsp ground ginger (I didn't have any mixed spice so I used 1 tsp cinnamon, 1 tsp ground ginger, 1/2 tsp ground cloves and 1/2 tsp nutmeg)
75 g chopped walnuts
(I also added 1/2 cup sultanas as I think a carrot cake should have sultanas or raisins)

Icing:
50 g butter at room temperature
25 g icing sugar
250 g cream cheese
a few drops of vanilla extract

The howto:
Preheat oven to 180 degrees C. Grease two 20 cm round cake tins and line the bases with parchment (to be honest, I don't have two 20 cm round cake tins, so I used one xx by xx pyrex ovenproof dish and did not bother to butter it). Add the oil, eggs and sugar into a large bowl. Whisk (using an electric whisk) until lighter and noticeably thicker. Gently fold in the carrot, and stir in the rest of the ingredients. Divide evenly between cake tins and bake for about 35 minutes or until a cake tester comes out clean from the middle of the cake. Transfer onto a wire rack to cool. I obviously transferred the entire batch of batter into my one dish and baked for about 50 minutes, until a cake tester came out clean from the middle of the cake.

Prepare the icing by combining all ingredients in a bowl and mix using an electric whisk until well combined and smooth. Spread half of the icing on one of the cakes, add the other on top and spread the rest of the icing on top. Decorate with walnuts. 

Note, I had a 300 g tub of cream cheese so I increased the amounts of ingredients for the icing as follows: 60 g butter, 30 g icing sugar and 300 g cream cheese.

The verdict:
This was a great and moist carrot cake. And I think the raisins were a great addition. Personally, I could live without the nuts, but they were put in by request from the Culinary Consultant and I'm not complaining, just saying that if I would be making the cake just for myself, then I would have left them out. But it's a question of personal preference. One thing I do have to say though is that I didn't find this cream cheese icing nearly as good as the one I made for my red velvet cake. Next time I will use that on the carrot cake. Also, if making a two layer cake, where you would need frosting both for the middle and top of the cake, I think using 250 g cream cheese would be a bit stingy. But again, both me and the Culinary Consultant think there is no such thing as too much icing, whereas you might prefer a different icing-to-cake ratio. 


Sunday, 9 March 2014

Red velvet cake


Yesterday was a very sad day. The little bunny you might have seen in my previous post, took up residence in our garden but was clearly very, very sick. When we got home on Saturday afternoon he was pretty much in the same position he was in when we left in the morning, and he didn't move anywhere when we got closer to him to inspect how he was doing. We tried calling the RSPCA but only got an unhelpful answering machine message saying they don't deal with small wild animals. After some online research we were quite sure the poor bunny was infected with myxomatosis which is a horrible bunny virus and there is no cure. We didn't quite know what to do, but in the end my lovely Culinary Consultant thought we can't let the poor bunny just die alone out there in the cold, so he made a little snuggly nest in a basket out of a blanket and lifted the poor little soul in there. He really was looking like he was suffering, breathing very shallow and quick and I looked up a 24 hour vet surgery in the area and called them. The nice lady there said they would of course have a look and also if it really was myxomatosis as we thought, they would help end the suffering of the poor little thing. 

When we got to the vet surgery last night we were greeted by a really helpful and friendly vet who examined little Bunny, and said it was certain that it was myxomatosis and also that there was nothing that could be done. So poor little Bunny went to heaven last night. Although it was incredibly sad, I'm very happy he didn't suffer any longer, and the vet also said that he was so weak it was unlikely he would have made it through the night. So I want to thank the wonderful vet who was on call at the Cromwell Vet Surgery in Huntingdon for her friendly help and support. It is always so hard to see animals suffer, and although I realise it probably didn't make any difference to the bunny at all whether he would have passed in our garden, or in the surgery, our tendency to anthropomorphise animals makes me believe he was better off spending his last hours in a warm and safe little blanket nest instead of being eaten by a fox. Funnily enough ZsaZsa, our little Boa, could clearly smell little bunny as he was huddled up in the basket in the corner of our kitchen, she was raising her head up and smelling the unfamiliar smell which probably smelled like food to her. Funny creatures, those snakes.

Rest in peace sweet little Bunny.
So my heart cake is dedicated to the memory of the little soul who went to bunny heaven last night.  Obviously, this was a cake I made for Valentine's day and haven't gotten around to publishing before now. And there is no reason why this wouldn't make a great cake for some other occasion such as a birthday.

I wanted to make this cake in my heart shaped cake pan, and was struggling as most recipes were for a full size two layer cake. So I ended up using this recipe which alledgedly is the Hummingbird red velvet cupcake recipe. 

I used a red paste colour as I don't think the liquid food colourings are very good. The pastes have much more pigment in them, but they don't allow you to make the paste with the cocoa powder. So I added 40 ml of water where the recipe suggests 40 ml red food colouring, and then added a few drops of the colour paste.

Small red velvet cake (or 12 cupcakes):
60 g unsalted butter
150 g caster sugar
1 egg
20 g cocoa powder
40 ml red food colouring (I used 40 ml water with a few drops of red paste colour)
1/2 tsp vanilla extract
120 ml buttermilk
150 g plain flour
1/2 tsp bicarbonate of soda
1 1/2 tsp white vinegar

Frosting:
50 g butter
300 g icing sugar
125 g cream cheese

The howto:
Preheat oven to 180 degrees C and butter your cake tin or prepare 12 muffin cases. Cream together butter and sugar, and when white and fluffy, add in egg and whisk until the batter increases in volume significantly. In a small bowl, mix the cocoa powder, food colouring and vanilla extract to a thick paste. Mix the paste with the butter-sugar-egg mixture until well mixed. Add half of the buttermilk, mix, add half of the flour, mix and then add the other half of buttermilk and flour. Mix until smooth. Mix the soda with the vinegar and mix with the batter. Pour into the cake tin or muffin cases. Bake muffins for 20-25 minutes and the cake for 45-50 minutes, until a cake tester comes out clean. 

While the cake is cooling, prepare the frosting. The original recipe says to cream together butter and icing sugar, but I just couldn't get it to cream, the icing sugar just kept flying around the room, so I also added the cream cheese immediately, and then kept creaming until smooth. The icing turned out really great.

The verdict:
The main reason to make this cake is definitely the icing. Don't you dare to decrease the amount of icing in the recipe. The cake is nice, but to me, nothing too special, it's a slightly chocolate-y cake. The buttermilk added a nice moistness to the cake, but next time I would definitely add more cocoa powder. But the icing. Oh my oh my. I loved the thick coat of icing on top of the cake, and I know the Culinary Consultant is a big fan of icing as well, this was a perfect cake for us. 

Saturday, 12 October 2013

Pudding meets cake

I have been feeling very melancholic lately. It is probably because the summer has definitely ended and fall is here, but also because I have finally time to consider all the recent big changes in my life now that I'm not desperately busy every single waking minute of every single day. I have been contemplating where the line is between appreciating what you have instead of focussing on what you don't have and not settling and giving up on your dreams. I haven't gotten very far with any conclusions yet, but the older you get, the more you realise everything you get in life comes with a price. And it's all well if you know the price you are going to pay, and you can decide to either do that or not, but sometimes it only dawns on you later what you really had to give up to make things happen, that's when it can be hard to accept. Suddenly you realise this wasn't at all what you signed up for. 

On to more mundane things. Such as plums. Lots and lots of plums. We have two plum trees in the garden, and both were heavy with plums. They were a bit raw up until about a week ago, when pretty much every single plum in the bigger tree just turned into over-ripe in a matter of a day or two. So we missed out on a lot of plums because last weekend there just wasn't any time for gardening. The other tree looked promising, but a few weeks ago when I picked a few of the first plums it turned out they all had a disgusting larvae inside, along with weird dark spots which I later learned were larval poo. Yicky!!! So I wasn't too excited about picking any more plums off that tree, until I read online that the most likely culprit was some sort of plum moth, and usually the first plums of the season were the ones affected with the parasite, and later crop should be fine. Luckily, that is what it seems like, lately I haven't run into a single disgusting creature in any of the plums I have used from that tree.

I am desperately trying to come up with plum recipes to use up at least a fraction of our plum crop. Unfortunately our very limited freezer space is occupied to pretty much every square inch, so there is no way of freezing any of those lovely plums. Apparently you can just freeze the plums whole or halved and then use for all sorts of lovely plummy puds later in the year. We should be getting a new, large freezer next weekend, and I'm hoping there will still be a few plums left to pick by then. If not, there is always the pears, the pear tree is so full of fruit, and they all look lovely. I have tried a few pears, but they are not very sweet yet but I can tell they will be really tasty when they ripen a bit more.

I have been googling plum cakes and pies for the last few weeks, and have made a few. For this one, I decided I would peel the plums, as I put them in with the peel on for my last plum dessert and it turned out that the plums were a bit bitter. So although it's an extra step and takes a bit of an effort, for our plums it really was worth the extra effort. Whether or not you need to do it will probably depend on the plums you use. I found this lovely looking Jamie Oliver recipe online, but made a few changes to it. I made the cake in a smaller cake tin (actually a cake silicon) so I halved the recipe for the cake part of the recipe. However, I did not halve the recipe for the topping, as everyone knows the topping is the best part. If you are a fan of really moist and super sweet cakes which have the texture almost like pudding, you will love this version. If you don't like overly sweet and super moist desserts, you should probably go with the original measures for everything. The recipe below contains the measures I used, see the original here if you think that would be more down your alley.

Plum upside down cake by Jamie Oliver (serves 5-6):
Topping:
125 g butter
150 light brown sugar (I only had dark brown, so I used that)
about 12 plums

Cake:
120 g butter
120 g caster sugar
2 eggs beaten with 1.5 tbsp milk
50 g ground almonds (I had a little less than that, about 40 g)
1/2 tsp baking powder
1/4 tsp salt
1/2 tsp vanilla extract
75 g plain flour
(25 g unblanched almonds, chopped. I didn't have any, so I skipped this and added 2 tbsp more flour instead)

The howto:
I started by peeling my plums, although you don't have to if you don't want to. I halved the plums and took out the pits, and poured boiling hot water over the plums and let them stand for a minute. Then I rinsed with cold water, and peeled off the skins. Most came off without any problem, although a few required a bit of teasing with a knife. I didn't slice the plums any finer than halves, but the original recipe says cut into about 1cm slices. If you don't have a silicone cake mould, butter your cake tin. Then, prepare the topping. Melt the butter in a saucepan, add sugar and cook for 2-3 minutes until the mixture is "foamy and pale" according to the instructions. Mine was dark (because of the dark sugar) and not foamy at all. But it worked perfectly anyways, so don't worry too much. Pour the sugar mixture into the cake mould/tin and arrange the plums on top. 
Preheat oven to 180 degrees C. Cream together butter and caster sugar and then add the eggs in two batches, mixing between additions. Then add the ground almonds, baking powder, salt and vanilla. Mix and then gently fold in the flour. Last, if you are using the chopped almonds, stir them into the mixture. Pour on top of the plums and bake for about 45 minutes (1 hour for the full size cake if you are following the original recipe). Jamie's recipe says to let rest for 2 minutes and then inverting onto a plate. I let it cool for much longer, probably about 45 minutes, and then inverted it and served with custard. 

The verdict:
I realised from the start that not halving the topping while halving the actual cake would change the texture of the cake quite drastically. I think my solution was great, but then again, I love really moist and super sweet puddings. The cake was delicious both warm and cold. I absolutely loved the sweet topping with the plums, and the way the topping had soaked into the cake as well to make it really moist and almost gooey. Between me and the Culinary Consultant, we actually managed to eat half of the cake in one sitting, so I would say it was truly a success. Fortunately, I might have to make it again, as there are so many plums to use up!
Card of the day:
Today's card is a birthday card I made for a friend. I like this simple but nice looking technique of cutting the cardstock into three equally wide sections, inking them up with distress ink and then stamping using the same colour. The colours on the card are Chipped Sapphire, Peeled Paint and Fired Brick. The stamp is a random stamp I bought from eBay. The sentiment is from my Hobbycraft sentiments stamp set, and I used Vintage Photo to ink around the edges of the banner. I matted the coloured strips onto black cardstock and attached everything to a white card. I like this technique, it has so many variations you can do by combining different colours and using different stamps. It's also really quick and easy to do. Next time I think I will leave a bit more of the black cardstock showing though between the panels to add another element to the card.


Sunday, 6 October 2013

Snake Cake

I have been planning this cake for ages, and this weekend we were celebrating a birthday so I got to put my plans into practice. Cakes never end up looking like you imagine them in your head during the planning process. Or maybe they do for professionals, but mine always turn out completely different. But it's all about going with the flow, what happens happens. Of course, having enough icing to cover the cake usually makes things easier, this should be a note to myself to always double the amount you think you need, because it looks like a lot until it's rolled out and then all of a sudden it's not enough after all. 
I took the easy way our and got ready coloured icing this time. I have coloured some of my icing myself in the past, but I was a bit constrained on time so I though I might as well make it easy on myself. Other than that, this cake was quick and relatively easy to put together. I had already decided on the basic design of it, I would do it as a swiss roll. Unfortunately, I used a Finnish recipe for swiss roll which I have been used to work with in the past, but it requires potato flour, which I couldn't find in the UK. Potato flour is similar to corn flour, so I substituted with that, but in my mind the cake was a bit too soft and fragile, I'm not sure if it's because I made the cake thinner than it should be or because of the flour substitution. In the end, the ugly and somewhat torn cake didn't matter as it all got covered with buttercream and icing. In my original plan, it was supposed to be a snake tightly rolled up into a ball like our snakes usually are, but it was impossible to get the swiss roll to bend onto a tight ball like structure, so it ended up looking like it did.
This recipe is for a swiss roll cake which in Finnish is called unelmatorttu (that translates roughly to dream cake or dream tart). I remember it from my childhood, my mum used to make it a lot. It is basically a chocolate swiss roll filled with buttercream. I added some cream cheese and white chocolate to the buttercream to add some extra flavour, but I also like the original version with only butter, sugar and an egg yolk very much. I borrowed the recipe from the Kinuskikissa blog (in Finnish). Pop over there to see how the cake is supposed to look if you just want to make the swiss roll if you are baking for an occasion where a snake theme might not be very appropriate (although of course I can't think of any occasion like that).

Dream cake (swiss roll, serves 6-8):
3 eggs
1 1/2 dl (150ml or 1/2 cup plus 2 tbsp) sugar
1 dl (100 ml or 1/2 cup minus 1 tbsp) potato flour (or cornflour)
1/2 dl (1/4 cup minus 1 tsp) cocoa powder
1 tsp baking powder

Filling (enough for filling and coating the cake, if you just want to make the swiss roll, make half the recipe):
250 g butter (at room temperature!)
2 dl (200ml, 3/4 cups plus 2 tbsp) icing sugar
300 g cream cheese
100 g white chocolate
light brown and dark brown icing to cover the cake
candy melts to decorate

The howto:
Start by making the cake. Preheat the oven to 200 degrees C. Whisk the eggs and sugar with an electric whisk until light and fluffy. Mix the potato flour, cocoa powder and baking powder, and sift into the sugar and egg foam. Very gently fold in the dry ingredients. Spread onto a baking tray which has been covered in parchment paper. I have a big oven with a baking tray which is approximately 40x30 cm which was perfect as I wanted a slightly thinner cake, but this recipe is designed for a 30x30 cm (about 12x12 inches) baking tray if you want to make the regular swiss roll which will give you a slightly thicker sponge. Bake for about 8 minutes. While the sponge is baking, sprinkle sugar onto a piece of parchment paper. When you take the cake out of the oven, immediately invert the cake onto the sugar coated paper and remove the parchment paper from the bottom of the cake. Let cool covered by a tea towel.
If you are only making a swiss roll, not the snake cake, only prepare half of the filling indicated above. Melt the chocolate. Cream the butter and icing sugar. Add cream cheese and white chocolate and mix. 
To assemble a regular swiss roll, spread the filling onto the cake, leaving about an inch or so free of filling at one edge. Roll into a tight roll, using the parchment paper for help. Let cool in the fridge at least for a few hours, preferably over night. You could cover the log with chocolate ganache if you like.
If you are assembling the snake cake, cut the cake into two equally big pieces along the long edge, so you have two long but narrow rectangles. Spread about a quarter of the filling on each, and roll into tight and slim rolls. I wrapped the cakes in parchment paper and let rest in the fridge for about two hours before shaping into a snake shape. I shaped the tail and head just by moulding the roll, it's pretty soft and kept it's shape well. Cover with the rest of the buttercream. Then roll out the light brown icing and cover the cake. Make details from darker brown icing, and make a tongue. I used chocolate chips for eyes. Finally, I melted the Candy melts in the microwave and put into a piping bag and piped some patterns loosely based on the patterning of our snake.

The verdict:
The cake definitely didn't look pretty before the buttercream went on, the cake kept tearing where it had been rolled, but also where I tried to shape some bends in the snake's body. But that doesn't matter, you can patch up ugly bits and bobs with the buttercream, and it will all be covered by icing nonetheless. When it comes to making cake, you can get away with pretty much anything because it will be covered up. The cake was just as delicious as I remember from my childhood, and it went down very well with the birthday boy and guests as well so I would say it was a success. It's not the most healthy of cakes, and it tastes exactly like that. The creamy and full flavour of the buttercream is nicely enhanced by the cream cheese, wrapped in fluffy chocolate sponge and the sweet icing. This is a picture of the cake and the model, you can hardly tell them apart!
Card of the day:
As there was a birthday cake, there obviously was a birthday card as well. The theme is a bit of an inside joke, as elephants have played a role in one of the bigger arguments we have ever had, so they have stuck around. Another thing we tend to... disagree... about is colours, as I like cold colours and the Culinary Consultant like warm colours. So I chose to use Stampin Up Real Red cardstock and stamped the elephant from the Animal Stories stamp set in the same same colour. I used markers to colour the Celebrate stamp from the Tag It set and cut it out using one of the Chalk Talk framelits. I used the outer edge of the same framelit to create the red backing for the tage. The green gekko is stamped in Old Olive, the stamp is from a random set of creatures i bought off Ebay ages ago. Using the gekko stamp again reminded me how you get what you pay for, the stamps were not expensive, but they are also extremely bad. The actual stamp is not high enough, so when you ink it up, you get loads of ink all over the background, and it's really hard to stamp without getting smudges all over the place. Also, no matter how hard you press, not all parts of the stamp come in contact with the paper, leaving ugly white dots all over the place. So lesson of the day, only buy good stamps, they are expensive but it's well worth the investment.