Showing posts with label buns. Show all posts

Saturday, 4 October 2014

Blackberry and poppy seed buns

After all our jam making sessions, we have a fridge full of jam. And although we are quite efficient at destroying it, I thought I would speed up the process a bit more by making some lovely jam buns. I just don't want to take the chance that our jam goes bad. Which is why we made relatively small batches of each jam, and put the rest of the fruit in the freezer for more jammin' sessions later in the winter. Right now our freezer is jam packed with produce from our garden and our mission is to make sure we actually eat everything before next spring (something we didn't quite achieve this year). 

This is a well used and trusted recipe for bun dough. It's from the Finnish website Kinuskikissa, and it always turns out great. You can either skip the ground cardamom or add it, as I Finn I would say buns are not buns if there isn't cardamom in them but if you absolutely detest it, leave it out. If you are undecided, I would suggest just give it a try. You won't regret it. It is such a wonderful flavour and it goes so well with the blackberries.

For this recipe you absolutely have to use home made blackberry and apple jam. It's only acceptable if it's been made from berries you picked yourself. Just kidding, just kidding. You can use any jam you like. I just can't get enough of our lovely blackberry and apple jam.

Blackberry and poppy seed buns (makes 12):
For the bun dough:
7-7.5 dl (2 3/4 - 3 cups) strong bread flour
1 1/2 tsp dried instant (fast-action) yeast
1 dl (1/3 cup plus one tablespoon) sugar
1/2 tsp salt
1 tbsp ground cardamom
2.5 dl (1 cup) room temperature milk
80 g melted butter
1 egg (technically speaking you should use 1/2 egg for this amount of dough, but I can't be bothered to use just half an egg so I just add a whole egg and it doesn't seem to make the dough any worse. If you want to use some egg wash to brush your buns before baking you could leave some of the egg for that)

For the filling:
1 tsp vanilla paste
About 1 cup of blackberry and apple jam
3-4 tbsp poppy seeds

For the glaze:
zest and juice from one lemon
4-5 tbsp icing sugar

The Howto:
In a large bowl, mix the flour (use 7 dl at this stage), yeast, sugar, salt and cardamom. Add milk, melted butter and egg. Mix to form a dough. Tip onto a lightly floured work surface and knead. The dough is a bit soggy, so I prefer to use only my right hand to knead and use a dough scraper in my left hand. If the dough is completely impossible, add some flour a little bit at a time, up to 1/2 dl (about 1/4 cup). The dough will start getting less sticky and more elastic as you knead it. I usually end up adding about a tablespoon or two during the kneading. Place dough back in an oiled bowl, cover with cling film and leave to rise for about 2 hours or until doubled in size. If it's cold or the yeast is a bit slow, the rise could take even longer. When the dough has approximately doubled in volume and it springs back when you push it with a finger, it has risen enough.  

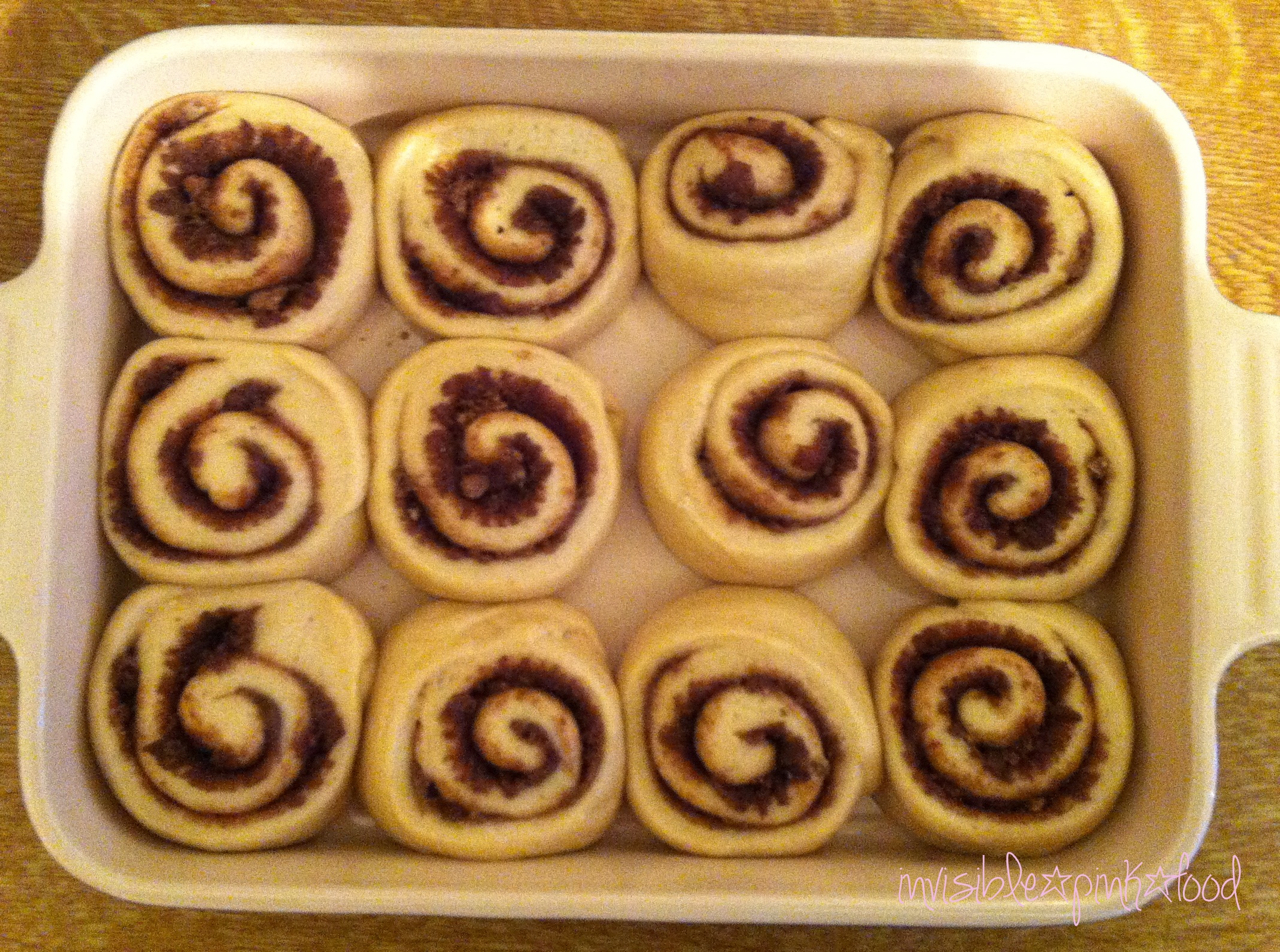
Tip the dough back onto a work surface and knead a few times to knock the air out of the dough. Roll out to a rectangle and drizzle with the vanilla paste. Spread the blackberry jam on top, and sprinkle poppy seeds. Roll into a tight log and cut into 12 pieces. I prefer to use dental floss to cut the roll, it results in the neatest cuts, believe it or not. Place in an oven proof dish leaving about an inch between the rolls. Cover with cling film and leave for a second proof for about 30-40 minutes, until the rolls are almost touching each other. Heat oven to 190 degrees C and bake for 20-25 minutes. If the buns are getting a bit too dark, you can cover them with foil to prevent them to turn very dark like mine did.

Leave the buns to cool for 15-20 minutes. Prepare the glaze by grating the lemon zest and squeezing the juice into a bowl. Add enough icing sugar to make a thick paste. Drizzle onto the buns. Serve warm.

The Verdict:
The best thing you can bake with yeast is buns. Well, maybe in addition to bread, but still. And one of the best things you can put inside buns in jam. These buns are sticky and sweet and amazingly good. I put a few of them in the freezer thinking the rest would last us a good few days. Well, they didn't. I inhaled several as soon as they came out of the oven. Hence the picture with a few buns missing... 


Saturday, 30 August 2014

Brioche buns


I have been meaning to try baking my own hamburger buns, as the store bought ones are simply disgusting. The quality of bread in general in this country is indescribably substandard. The only way of getting a decent loaf of bread is to bake it yourself. Sometimes you may run across a small bakery that makes good bread, but living beyond all civilisation we don't have any good bakeries anywhere near us. I do like my burgers in a nice brioche bun, so I thought why not try it. As I was working the dough I was once again reminded that making brioche dough by hand is a pain, and that I need to start saving up for that Kitchen Aid ASAP.

I found this recipe by simply googling brioche buns. It's from a blog called The Clever Carrot, and they looked so yummy. The blog also has some great step by step tutorial with photos if you are not a very experienced baker (but it's only for using a food processor to make the dough).

Brioche hamburger buns (makes 8):
1 cup warm water
3 tbsp warm milk
2 tsp dry yeast
2 1/2 tbsp sugar
2 large eggs
3 cups bread flour
1/3 cup all purpose flour
1 1/2 tsp salt (I would decrease this to 3/4 - 1 tsp)
35 g butter
(seeds for topping if desired)


The howto:
Mix the water, milk, yeast and sugar in a jug or small bowl and let stand for five minutes. Meanwhile lightly whisk the egg in another small bowl. In a large bowl, mix the flours, salt and butter and either use a paddle attachment on a stand mixer or your fingers to process until resembling coarse sand. Add the yeast mixture and egg and either process in a stand mixer for 8-10 minutes until a dough forms, or use your hands to mix and then knead for 10-15 minutes. The dough is sticky and rather tough to knead by hand, but don't add more flour as that makes the dough too dense. I used a dough scraper in one hand and the other hand to do the kneading. It will get slightly less sticky at some point when the gluten starts forming. Return to the bowl and let the dough rise until double in size. This will take 1-3 hours, and it's worth letting it rise properly as that is what will give you those wonderfully light and fluffy buns. 

When you are happy with the size of you dough, scrape it out onto a floured surface, and knead a few times to push out all the air. Divide into eight equal sized balls, and shape into rolls. Place onto a parchment paper covered baking sheet and cover with a towel and leave to rise for another hour. Towards the end of the second raise, pre-heat oven to 200 degrees C (400 degrees F). Brush with egg wash ( egg mixed with a bit of water) and sprinkle with seeds of choice if desired. Place an oven proof dish with water in the lower part of the oven, and place rolls in the oven to bake for 15-20 minutes, until golden brown. Let cool.


The verdict:
Before starting, I have to admit I made a mistake when making the dough, which I only discovered when I typed up the recipe for my blog post. I only put one egg in the dough instead of two. I was wondering why the dough wasn't quite as soggy as I had expected (although it was sticky enough, trust me). So all I can say is that the buns turned out great when using one egg. They were really tasty, and very light and fluffy. The only change I would make is to reduce the amount of salt to half of what it is, I don't like my bread very salty and this was certainly a bit on the extreme side. But other than that, these were the perfect hamburger buns. They were also perfect for eating with nothing but butter while fresh out of the oven, and they were perfect for eating for breakfast with butter and jam (such as this awesome plum jam). This is definitely a keeper, although the kneading is a bit of a messy business it's definitely worth the effort. 
The buns are perfect for hamburgers but also delicious
simply with some butter and jam.

Monday, 26 May 2014

Blueberry and lemon quick buns


We have reached the end of bank holiday season. It's been so wonderful to have Easter and the two May bank holidays so close together, so many short working weeks has made this spring just fly by. And now it's almost the end of May, I swear someone robbed me of at least two weeks as the month has just flown by. May is such a special month to me, it's my birthday as well as the birthday of many good friends. This year I have preponed (not even Google seems to be sure if this is a real word or not...) my birthday to today, as the UK has been so rude as not to have a bank holiday on my actual birthday. I feel very resentful about this, as I enjoyed my bank holiday birthday last year. So I decided to make myself a delicious birthday breakfast today instead.

I think coming up to a birthday will give you the right to muse a bit about your life so far. In fact, two short birthdays ago my life was very different. My birthday fell on a Sunday, and I decided to bake some blueberry and strawberry scones to celebrate. The scones turned out to be a complete disaster as I forgot to turn the heat on in the oven, I had only turned on the lamp, and after 20 minutes of nothing happening with the scones in the oven, I suspected something was wrong. When I finally managed to bake the scones they were rather ugly blobs. There I was sitting in my tiny shoebox penthouse apartment all alone with not the slightest idea in the world that my life was about to change. Back in those days I still worked at the Wellcome Trust, and my bestest friend lived in the same city with me. A month later I went on the first date with the Culinary Consultant. Exactly a year later, I had finished my job contract, was about to start a new job and was cleaning out my apartment as I moved in together with the Culinary Consultant in his bachelor pad. In fact, last year's bank holiday Monday was the last day I spent in my old place. Since then I have changed jobs again and I'm rather happy I did. Last July we moved from the tiny bachelor pad to our countryside home, which to me is a dream come true. And we can still put up with the sight of each other. As I'm enjoying my slightly early birthday breakfast, I can't help but think I might be one of the luckiest people alive.

The recipe for my yummy breakfast is from the ever so deliciously looking The English Kitchen blog. I know I end up making so many recipes from that blog, but what can you do, her taste is really close to mine in so many things! This is what I love about blogging and following blogs, it takes a while of reading a blog until you know whether you want to follow it or not. And after a while you get curious about the people who write the blog. And they have all these amazing stories and experiences and you almost feel like you know them. The lady writing The English Kitchen seems like one of those people you could just sit down and have tea with and she would be the most lovely person on the world. And her recipes are always delicious, and every time I have tried them they turn out perfect.

Blueberry and lemon quick breakfast buns (serves 6-8):
250 g all purpose flour
2 1/2 tsp baking powder
finely grated zest of 1/2 lemon
pinch of salt
3 tbsp sugar
40 g butter
1 large egg
75 ml buttermilk (I made my own by adding a tsp of vinegar to milk)
a splash of buttermilk for brushing

For the filling:
12 tbsp sugar (I only used 8 as it seemed enough...)
55 g butter 
zest from 1 lemon
250 g blueberries

For the glaze
195 g icing sugar
grated zest from 1/2 lemon
juice from 1 lemon
15 g softened butter
a splash of milk

The howto:
Preheat the oven to 200 degrees C and butter a oven proof dish. The original recipe says oval dish 12 inches and 8 inches at it's widest. I used a rectangular 10x6.5 in dish, which left a bit of room between the buns, but they expanded to fill that extra room. Mix the flour, baking powder, grated lemon zest, salt and sugar in a bowl. Using your fingers, mix in the butter until the consistency of coarse sand. Mix the egg and buttermilk, and mix into the dough. Only mix until the dough has just come together. If needed, add another splash of milk if the dough is too dry.

To prepare the filling, mix the sugar, butter and lemon zest in small bowl, and rub everything together using your fingers.

Knead the dough once or twice on the table. Then pat the dough out into a rectangle about 8 times 12 inches and 1/2 in thick. I did this on a parchment sheet to help the upcoming rolling step. Spread the flavoured butter on the dough and add the blueberries, gently pressing the filling into to dough. Use the parchment paper to roll the dough into a tight roll along the long side. Pinch the dough together at the seam to ensure that the filling stays in the roll. Cut the roll into eight slices using a sharp knife and place in the oven proof dish. Brush with buttermilk and bake for 20-25 minutes or until golden and bubbling. 

While the buns are baking, prepare the glaze. Mix the ingredients for the glaze, adding enough milk to make it a runny consistency. Spread onto the buns when they come out of the oven, and let stand for a few minutes. Serve warm.

The verdict:
These quick buns are amazing. I had one for breakfast, and then picked away at a few during the day as I couldn't pass the dish with the buns without having a spoonful or two. They are the easy way out if you love buns for breakfast but don't want to wait for the yeasted kind to proof as you once again forgot to pre-make the dough the previous evening. They are sweet and juicy. And the lemon goes really well with the blueberries. Often recipes that are named "lemon" something only have a very faint flavour of lemon. This recipe has enough lemon so that you can taste it. I thought the scone dough would be difficult to work with, but it was really easy to roll and kept it's shape really well during baking. There is quite a lot of glaze, so you might want to consider only making half of it if you are a fan of light glazes, although I think the glaze is the crowning glory, so I was happy to have loads of it.


Saturday, 1 February 2014

Korvapuusti - Finnish cinnamon buns


Bring on the weekend! I spent Friday as I usually do, hitting the gym after work, and then getting home, getting in my PJs and having dinner and resting my poor aching bones and muscles. Then I snuggled up in bed while waiting for the Culinary Consultant to finish pudding. And I fell asleep (well, it was close to midnight, so you can't blame me). Then I was served warm rhubarb crumble and custard in bed. I ate it while reading a book, and then went back to sleep. That is what I call a perfect start to the weekend. Today I have been very domestic, cleaning the house and cooking. And I had a very productive crafting session in the morning. I can't believe this is what my life has come to. Cooking, cleaning, crafting and sleeping. And I'm loving it! My friends go out to party, seeing movies and being social. I don't know when I turned 75, but clearly that happened sometime in the last year or so. But I'm not complaining. We go through phases in our life, and clearly I'm going through a very peaceful and domestic phase. Instead of worrying about it, I will enjoy it wile it lasts. Who knows what tomorrow will bring, so do whatever makes you happy right now!

Talking about what makes you happy, let's talk about cinnamon buns. But not just any cinnamon buns, Finnish cinnamon buns. I think I have posted a recipe for Finnish cinnamon buns before on the blog. But I'm not sure. When I was reading food blogs, I always laughed at blog authors who said they weren't sure whether they had posted a recipe or not. I thought how can you not remember what you have posted. Well, here I am, with less than two years of blogging behind me, about 150 blog posts, and I have no idea what I have blogged about in the past. So no wonder others who have been blogging for years and years cannot remember what they have posted. But the upside to all of this is, if I can't remember, I doubt anyone else can either. And to be honest, these buns are so incredibly good that I can't write enough about them anyways. So either for the first or second time, Korvapuusti, or Finnish cinnamon buns. I have taken the recipe from Kinuskikissa, the most popular Finnish baking blog, and I think the recipe for bun dough is the best I have ever used. I also used the instructions here from the same blog for the filling. 

Korvapuusti (Finnish Cinnamon Buns), makes about 36 buns:
500 ml milk (any level of fat, but I like whole milk the best)
15 g instant yeast
2 dl sugar (200 ml or 3/4 cup plus one tbsp)
1 1/2 tbsp ground cardamom
2 tsp salt (I usually use less, about 1 tsp)
1 egg + 1 egg for glazing
200 g butter, melted
about 15 dl (i.e. 1.5 litres or 6 and 1/4 cups)

For the filling:
150 g butter, room temperature
200 ml light muscovado sugar (3/4 cup plus one tbsp)
cinnamon

The howto: 
Mix the milk and the yeast. Add the sugar, cardamom, salt and egg. Add about 3/4 of the flour, mixing with a wooden spoon and later with your hands. Add the melted butter, mix more and add the rest of the flour. The dough is a bit more sticky than regular bread dough, but it should be possible to knead it without too much sticking. I usually use a dough scraper to help me. Knead for about 5 minutes. Place in a bowl and cover with cling film, let proof in a warm place (I like to place the bowl on top of the boiler) until doubled in size, about 1.5 hours. 

Take the dough out of the bowl and knock it back (knead gently to knock the air out of the dough). Divide into two halves and work one half at a time. On a lightly floured table, roll into a rectangle, the dough should not be too thick. The origin for this recipe suggested about 25x85 cm rectangle, I never measure mine, it's not that important I think. Except if you are on the Great British Bakeoff and are being judged on each bun being the same size. But my buns are all individuals, and celebrate their wonky appearance.

Spread half of the butter onto the dough. If it's too hard to spread, pop it into the microwave for a few seconds. Sprinkle half of the muscovado sugar on top. Sprinkle with cinnamon to taste. Then roll into a tight roll (roll along the long side of the rectangle so that you get the longer possible roll). Divide roll into bun sized chunks, to me about 16 made a nice sized bun, it's not too big so you can eat at least two in one go. Do the same to the other half of the dough.
Shaping of the Korvapuusti is a personal decision every baker has to make on their own. You can cut straight down the log, giving you neat chunks. These can be placed on the baking sheet either with the cutting side up (this is the Swedish way of baking them), or in the same orientation they are when you cut them off the roll. But the traditional shape of a korvapuusti is to cut them at an angle as you can see in the picture below. They are then placed on the baking sheet with the wider part to the bottom (so every second piece needs to be flipped upside down compared to the orientation they are in when cut). Using your finger, press to make an indentation at the top along the length of the bun. This will allow the buns to spread when baking, giving them the traditional look of ears, which is where the buns get their name. Korvapuusti is the Finnish word for "slap around the ear".
Traditional korvapuusti are cut at an angle.
The cut pieces are placed on a baking sheet with 
the wide part facing down and an indentation
 is made on top to push the sides out and give 
the buns their ear shape when baking.

Preheat oven to 200 degrees C. Let the buns rise on the baking sheet for another 10-15 minutes. Then brush with egg and sprinkle with pearl sugar. I don't know if you can get the pearl sugar outside Scandinavia, I always export some with me when I leave Finland. Pearl sugar is the only correct sugar to use on buns, but if you don't have access to it, regular sugar will do as well. Bake for 10-15 minutes. The buns should have a golden colour, but I like mine rather a teeny tad underbaked than overbaked.

The verdict:
My Grandma always says that "Children should have pulla (Finnish word for buns)" and I think cinnamon buns are the best. AndI might be a bit biased, but I think this is the best way to make Cinnamon buns. I love any bun, including the American ones with all the glazing and stuff, but the Finnish simple buns will always be the best. They are pretty and taste amazing. They are best eaten on the day of baking, I like them best while still warm, and just might or might not have eaten four of these babies almost as soon as they came out of the oven. If you eat them the next day, give them 20-30 seconds in the microwave and they will be perfect again. The buns freeze well, and can be frozen either before or after baking.


Tuesday, 19 March 2013

Amazing Cinnamon Buns

I love buns. Particularly cinnamon buns. And I haven't been able to find any that I really like around here. Sure, there is Cinnabon. But they are ridiculously expensive, and there is something dodgy about them. I just don't like the flavour. But I stumbled across this Cinnabon copycat recipe on Pinterest, and thought it looked quite yummy. The original recipe also has some really good pictures of the whole baking process, so head over there to take a look if you are not a seasoned bun maker. 

I made a few small changes to the original recipe. It used margarine for the bun filling and frosting, but I would obviously never use that stuff in my kitchen. I also added some cardamom to the filling. For a Finn, you can't have buns without cardamom. The other changes I made was using instant yeast instead of active yeast. That way I can skip the step of activating the yeast. And finally, I still don't have a kitchen aid, so I did all my dough kneading by hand. One happy day I will have a shiny and lovely dough kneading machine, but that won't happen until I win the lottery. 

I was afraid the buns would be a bit of a disaster as I didn't have any strong flour, but was forced to stick with all purpose. With any yeast dough that needs to be kneaded, I have grown to realise strong flour will make the dough easier to work. But this time all purpose seemed to do the trick just fine. I also ended up giving the buns quite a long rise before popping them into the oven because of how the whole day turned out, and I think that did the buns good. 

I apologise for the even crappier than usual photos on this one, as I didn't have my camera with me when baking. But as I found this recipe so perfect, I couldn't let the lack of decent photos stop me from blogging about it. Also, head over to the original recipe here for impressive photos of these doughy lovelies.

Cinnamon buns (makes 12-15):
3/4 cups warm water
2 1/4 tsp instant yeast
1/2 cup caster sugar
1 tsp salt
1/4 cup buttermilk
1 egg
1/3 cup vegetable oil
4 1/2-5 cups flour

Filling:
1/2 cup butter
1 1/4 cup muscovado sugar
2 1/2 tbsp ground cinnamon
2 tbsp cornstarch
1 1/2 tsp ground cardamom

Frosting:
60 g cream cheese
1/4 cup softened butter
1 tsp vanilla extract
1/2 tbsp corn syrup (I didn't have corn syrup so I used golden syrup, not quite sure what the difference is)
1 tsp lemon juice (I used a bit more, probably 2-3 tsp)
1 1/4 cups powdered sugar
The howto:
Start by preparing the dough. Mix water and yeast. Add the sugar and salt. Mix buttermilk, egg and oil in another bowl and add to the to the yeast mixture (or if you are lazy like me, just add buttermilk, egg and oil directly to the yeast mixture). Start by adding about half of the flour, and then add about half a cup at a time until the dough doesn't stick to the bowl anymore and is easy to handle but still soft. Knead the dough for about five minutes and leave to rise in a warm place until doubled in size (1-2 hours, I let mine rise for 1h and 20 minutes). While the dough is rising, prepare your oven proof tin for the buns. You can butter the bottom of the tin, or use a (buttered) sheet of parchment paper. I just dumped the buns straight onto my Le Creuset ovenproof pan without any butter and, apart from some butter sticking to the bottom, had no problems.

When the dough is almost done rising, prepare the filling. Mix sugar, cinnamon, corn starch and cardamom in a bowl. Punch the air out of the dough, and roll to a 20x30 in (50x75 cm) rectangle. Spread the softened butter over the dough, leaving about 1 inch (2.5 cm) at the bottom unbuttered. Sprinkle the cinnamon-sugar on top, and press into the butter using your hands. Roll into a tight log, and cut into desired number of rolls. I read a tip in a food blog somewhere suggesting you use dental floss to cut your buns. I finally tried this trick, and got the prettiest buns I have ever managed to produce. Place buns in your pan, and let rise for at least an hour, but you can even leave them in the fridge over night and then let them rise the following day. The original recipe says to bake in 175 degrees C (350 degrees F) for about 17 minutes. I was dealing with the temperamental oven at the Culinary Consultant's place, so I baked mine for a bit longer.

While the buns are baking, prepare the frosting. Start by whipping together the cream cheese and softened butter. Add vanilla, lemon juice and syrup and mix. Finally, add the icing sugar and whisk for about five minutes until the frosting starts to lighten in colour. After removing your buns from the oven, immediately spread half of the frosting on top of the buns. It will partly melt and drip into the buns. After the buns have cooled for a while, frost with the remaining frosting. 

The verdict:
As I already mentioned, I just don't like Cinnabons. There is something strange about their flavour, something artificial. Sure, they are lovely and gooey, but every time I have one, after taking the first bite I am reminded why I don't quite like them. So I can honestly say, to me these buns were so much better than Cinnabons. They were like I want Cinnabons to taste. They were absolute perfection. The filling of the buns was lovely and sweet, and the frosting is so addictively delicious. I have to admit the buns disappeared very quickly. The following day I just popped them into the microwave for about 20 seconds to get them lovely, warm and gooey again. This recipe will definitely go into the keepers file. I can't wait for an excuse to make them again.


Wednesday, 17 October 2012

Operation smoke smell removal


Last week on the night between Monday and Tuesday at 1.22 am, I woke up to the fire alarm. Which in my building usually means that someone got home from a night on the town, decided to make themselves a toast. We have ridiculously sensitive smoke alarms in the building I live in, and they usually go off at the first molecule of burned toast. This happens regularly. There are no words to describe how annoying it is. Sometimes when I cook so that I'm using both my oven and hob, the apartment just gets so hot it sets off the heat sensors. Even with all (i.e. both) windows open. And nothing burning. Just from the water vapor from boiling stuff and the heat. Which again, I think is inhumaine conditions to live (i.e. cook) in. But believe me, no matter how annoying it is to have to run down all 52 steps of stairs to turn off the alarm, that is nothing compared with what it feels like when the alarm goes off because of an actual fire. 

In this case, my downstairs neighbour had been smoking inside, then set off to paint the town red. Leaving the smouldering cigarette butts to set fire to the apartment. Did I mention, it is strictly prohibited to smoke in the building (the whole building is owned by my letting agency, and therefore all tenants have the same rules to follow). And ironically, only a few weeks ago, there was a letter sent to all tenants about complaints of someone smoking in the building, and that this has to stop immediately. Well, clearly it didn't. It's one thing if you make the choice of ingesting toxins through a burning stick, but seriously, go outside and do it. At least then it's only you who are suffering the consequences, instead of risking the lives of a building full of people along with all their earthly possessions. Just thinking of this still makes me shudder with anger. If I ever run into that guy in a dark alley, let's just say some parts of his anatomy will be running a very high risk of being very violently pulled off. Ok, that might be just a bit over the top, obviously I woud never hurt anyone (consider that a legal disclaimer...) but boy am I angry at him.

So there we were, thankfully everyone accounted for, huddling outside in the street, clutching our computers and watching a horrible cloud of smoke pouring out of the burning flat. There were three fire trucks and probably a dozen firemen. It looked really bad, we were afraid the whole place would burn to the ground. Also, note to self, if fire alarm goes off in the middle of the night, grab something warm to wear. Thankfully I had at least grabbed my coat and a pair of warm shoes, but a girl from downstairs had only thrown a coat on what appeared to be a pair of very skimpy jammies, as her legs were totally bare. At that point I was very thankful for sleeping in a pair of jammies with full length trousers and a long sleeved top. I did make quite a fashion statement standing there on the street in my cow jammies and trench coat.

To make a long story short, we stood there freezing for over two hours while the firemen slaved away at saving our building. After a while the amount of smoke started to decrease and eventually stopped completely. And after what seemed like an eternity, one of the firemen came over to us to inform us about the extent of the damage. The firemen were able to contain the fire to the apartment where it started, which was obviously an incredible relief to us all. And after another hour or so of airing out the worst of the smoke, the people living on the two lower floors were let back in. Me and my next door neighbour however, were not that lucky. Because we live on the top, all the smoke had accumulated in our flats. So there was no way we could sleep there that night.

I asked if I could go up and grab a few things, and I was allowed to do that. The hallway looked like a bomb had exploded, well at least a smoke bomb. There were black markings all over the carpets and floors, and water was dripping from the burned flat to the hallway below. And when I got up to my flat, the smell was horrible. Not just the overwhelming stench of smoke, but a sharp, toxic smell of burned plastic. I grabbed a few things as fast as I could, leaving all (two) windows wide open into the night as I asked the fireman if I could lock the door behind me. Which I was allowed to do, leaving feeling very lucky everyone was unhurt but at the same time worried about how much smoke damage my possessions, particularly my expensive dresses and shoes had sustained. Luckily Best Friend lives literally around the corner, so there I was, past three am, clutching my bag which was stinking of smoke and hoping Best Friend would answer her phone. "Sorry to wake you, but my house was on fire, and I'm not allowed to go back tonight. Can I crash at yours?".

Funnily enough, after describing the main events of the dramatic night, I fell fast asleep in Best Friend's warm apartment, under a huge down duvet, and slept without waking until the morning. Then Best Friend fed me and gave me clean clothes, and off I went to face the damage. I sent off an email to my various bosses to say that I have to sort out the damage to my apartment, and thankfully they were very understanding.

Walking in to the building was like walking into a war zone, in the daylight the stairwell looked even more horrible than it had the night before. And the smell in my apartment was absolutely nauseating. I must not have been thinking completely clearly (well, after a night of quite a shock followed by only three hours of sleep it might be expected that your thought processes are just a tad muddy) because the first thing I did was to do my dishes and wash my bathroom. My only thought was that I would have been mortified if someone from the insurance company had walked into the horrible mess that was my apartment and seen my dirty bathroom. Then I wiped off the worst of the dirt from the firemen's boots off the floor. There wasn't much more I could do, so I left the windows wide open and headed into town to get a few hours of work done from an internet cafe. It felt like a huge relief to be able to breathe in fresh air as I got out of the building.

Now, a week later, the smell is almost gone from my apartment. I currently have three air freshers and a reed diffuser scattered around the apartment, and have been burning scented candles almost every night. The windows stayed open all day and all night for the first four days. Sleeping was a bit chilly, but I think that really helped get the smell out. And I have been trying to cook a lot. Foods that would spread a nice, warm scent which would drive away the disgusting smell of smoke. Which is where today's post comes in. Is there any other scent that is as soothing and enjoyable as cinnamon rolls baking? That was my only thought, I had to make cinnamon rolls. However, in my rather exhausted and stressed out frame of mind, I couldn't imagine making a proper proofed dough, as it involves quite a bit of work as well as a lot of waiting. Back home, you can buy all sorts of ready made doughs and buns in the frozen food section, and just whack them in the oven for that lovely baked at home smell. In this country however, nothing like that exists. Or at least I haven't managed to find any ready to bake cinnamon buns. 

Wow, are you still reading? Ok, at this point I should probably reward you with the actual recipe. After all that word vomit above, the point was that I needed to make something resembling cinnamon buns, and to do it with minimum effort. The only thing I could come up with that was readily available from any grocery store (because this was in the middle of the week, so I didin't have time for a 40 minute track to the nearest supermarket, but had to come up with something I could get from one of my five (!) local tiny grocery stores) was puff pastry. Puff pastry cinnamon rolls... hmmm... I was skeptic to say the least. It seemed a bit like sacrilege. But then the thought of the smell in my apartment versus the scent of newly baked cinnamon rolls was the deciding factor. What the heck, I'll  go for it. If they taste totally vile, I'll just bin them, at least the apartment would smell nice. So I whipped up a cream cheese and cinnamon filling and tried it out. 

Super quick cinnamon rolls (makes about 12 rolls):
250 g ready made puff pastry
100 g cream cheese (I used Philadelphia Light)
2 tbsp light muscovado sugar (or more, depending on the level of sweetness you want)
1 tsp ground cardamom
1 tbsp cinnamon

1 egg for the egg wash
icing sugar for dusting

The howto:
Preheat oven to 200 degrees C. Mix cream cheese, sugar, cardamom and cinnamon until smooth. Roll out the puff pastry to a rectangle, spread the filling on the pastry, leaving a few centimeters of one long side of the rectangle free of the filling. Use a fork to mix the egg to make the egg wash. Brush some egg wash onto the filling free part of the pastry, this will help seal the buns (although as you can see from the picture below, I didn't use quite enough egg was to keep the rolls sealed). Roll into a firm log finishing at the side with the egg wash. Slice the log into individual buns, about 3 cm thick. Place on a baking sheet, brush with egg wash and bake until golden brown, about 20 minutes. Transfer to a rack to cool, and dust with icing sugar. 


The verdict:
It's probably not fair to call this a recipe, as it's more of an assembly of pre-prepared ingredients. But desperate times (like a fire, or any other desperate need for cinnamon buns) calls for desperate measures. I would love to say that the buns spread a wonderful scent which drove away the smell of smoke from my flat, and then I just threw them in the bin, I mean who would eat sugar and fat rolled in puff pastry... Of course that's not exactly how it went. The wonderful scent of cinnamon buns did fill my apartment for a while, and although unfortunately not removing the smell of smoke completely, did do the trick. And as soon as the buns had cooled enough to not mortally wound me, I inhaled several of them before even sitting back down on the sofa. And they did taste heavenly. Obviously, they cannot be compared to real cinnamon buns, as there is nothing as comforting as traditional soft cinnamony buns. But for an emergency bun-a-bies, they actually did the job really well. Just think, from puff pastry to ready made buns in about 30 minutes. How's that for a quick cinnamon bun fix? One technical note though, I would make sure to bake the puff pastry until baked quite well. I usually like my puff pastry a bit under done, but in this case, you want the pastry to be really flaky and well baked. So make sure to bake it until it's a deep golden colour, but obviously get it out before the edges of the buns turn dark brown.

I enjoyed my bun substitutes with some leftover cream I had in the fridge and some chocolate spread. Yes, that disgusting thing you buy from the supermarket which tastes of cheap chocolate and horrible unhealthy fats. But in my defence - my flat almost burned down. I wonder how long I can use that as an excuse to eat absolutely disgusting things? And actually, I would think using the chocolate spread as a filling in the buns would work really well. Maybe sprinkle a few chocolate chips on as well. Or maybe make lemon bun substitutes by doing a filling of soft cheese and lemon curd. Why not go totally crazy and mix some roasted strawberries or some other fruit with the cream cheese. I guess that would result in some kind of weird Danish pastry bun... Just use your imagination, it seems like puff pastry is an empty canvas for a food obsessed mind. Oh, and my local grocery store only had a huge pack of puff pastry available, so expect puff pastry to star in a few future blog posts, although it's something I almost never use. Which you wouldn't believe if you knew what is coming up next. Well, I guess you just have to wait and see. Until then, be careful with any open flames!